

Common Kitchen Conundrums
The Top 10 Functional Problems In Residential Kitchens and How to Fix Them

Your kitchen looked fine in the photos. Then you moved in and realized the island blocks the main walkway, the range hood just recirculates smoke, and you trip a breaker every time you make toast. These ten problems show up in nearly every kitchen. Here's how to fix them

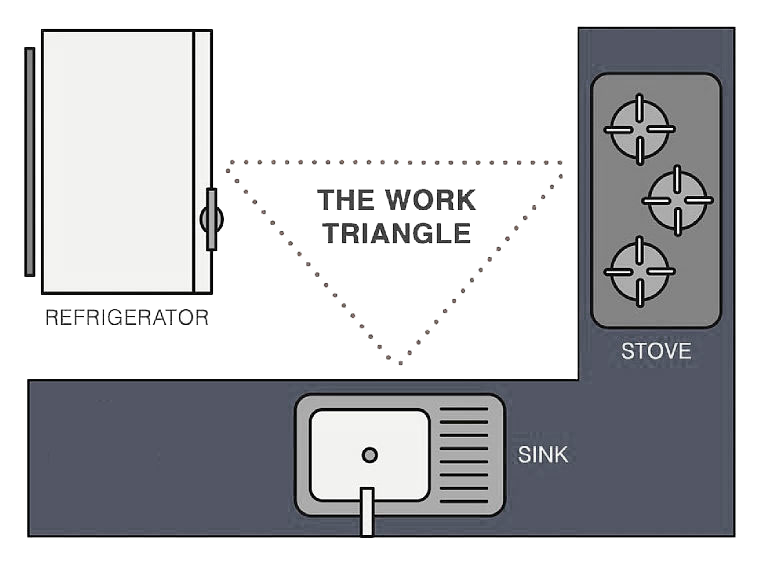
1. The Work Triangle Is a Myth But Traffic Jams Are Real
What People Ask: “Kitchen island blocking work triangle”
The Problem: The fridge and stove are positioned just far enough apart to make every meal mildly irritating.
Tips from the Pros
Each leg of the triangle (sink → fridge, fridge → stove, stove → sink) should be 4–9 feet. That means if you’re standing at your sink, the fridge should be roughly two to four normal steps.
Total perimeter of triangle: 12–26 feet
If your kitchen can’t accommodate a triangle, galley kitchens, for instance use zone planning instead. Prep zone near the sink. Cooking zone at the stove. Cleanup zone by the dishwasher. Logical.
DIY Fix: Reorganize your stuff by task, not by where someone guessed it should go. Prep zone: sink, cutting board, knives, trash. Cooking zone: stove, pots, oils, spices. Cleanup zone: dishwasher, drying rack, dish storage.
When To Call a Pro: You’re moving plumbing. That requires permits and someone who won’t flood your crawlspace.
2. The Traffic Problem
What People Ask: “Minimum distance between cabinets and dishwasher”
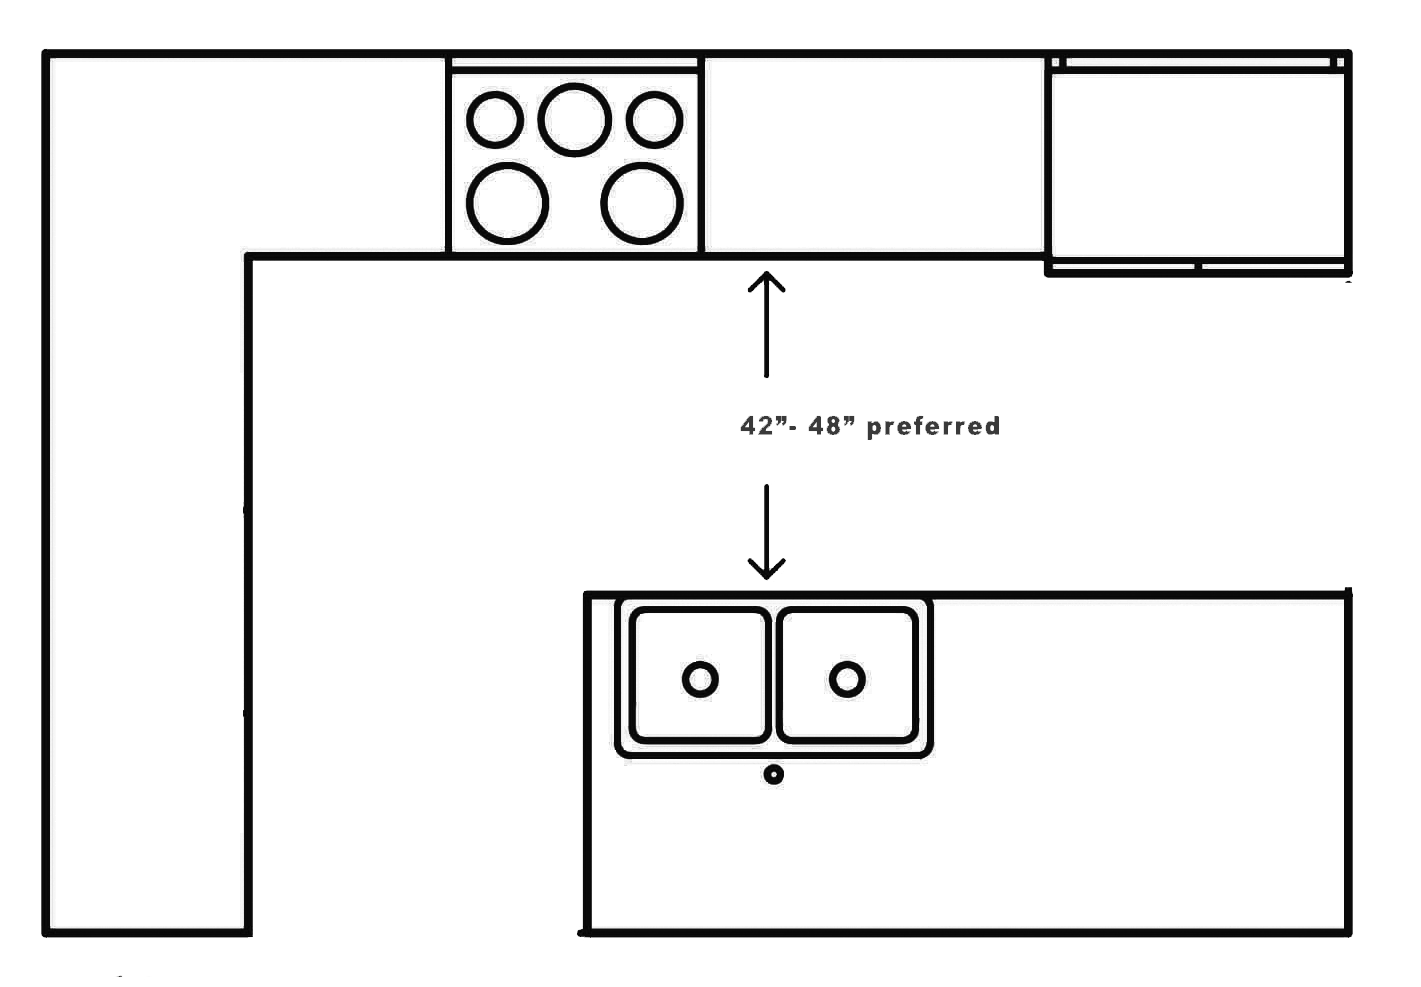
The Problem: The aisle between island and cabinets requires everyone to walk sideways.
Tips from the Pros
Aisle clearances with all cabinets and appliance doors closed
42 inches – Comfortable for one cook; allows a dishwasher door to be open and someone to pass sideways.
48 inches – Ideal if two people will cook at the same time.
36 inches – Absolute minimum. You can technically use it, but it will feel cramped.
DIY Fix:
Trim the island or remove decorative panels
Replace standard stools with backless ones if they face the aisle
Remove seating from the problematic side
Convert to a peninsula or movable table in extreme cases
Call a Pro When: Redesigning. Never sacrifice aisle width for extra counter depth. The guidelines prioritize movement over surface area for good reason.
3. The Decorative Range Hood
What People Ask: “Why does my kitchen stay smoky with vent on?”
The Problem: Your range hood doesn’t vent outside, it just recirculates air through a filter. Or it does vent outside, but the filter hasn’t been changed in years.
Tips from the Pros
Vent to the outside whenever possible
Size properly: Your hood needs to move enough air to actually clear smoke. CFM (cubic feet per minute) measures how much air the hood can pull out; higher numbers mean more power.
Gas stoves are rated in BTUs (heat output), so you need 100 CFM for every 10,000 BTUs your burners produce. Most standard gas ranges need 300-400 CFM minimum. Electric stoves also need 300-400 CFM minimum, but they're measured differently since they don't have BTU ratings. The rule is simple: more heat and smoke = more ventilation required.
Use smooth metal ductwork, not flexible foil
Keep duct runs as short and straight as possible because bends reduce the allowable duct length and efficiency. For a standard 300-400 CFM hood with 6-inch ductwork, aim for under 30 feet total with no more than two 90-degree bends.
International Residential Code: Each 90-degree bend reduces your allowable duct length by 5 feet. Each 45-degree bend reduces it by 2.5 feet. (Similar rules apply to other vents like dryers and boiler vents)
DIY Fix: If you’re trapped with a recirculating hood, upgrade to one with proper baffle filters and charcoal cartridges. Change them every three months.
Put it in your calendar because you won’t remember.
Call a Pro When: Running new ductwork through walls, ceilings, or roofs. This is not a YouTube-tutorial situation.
4. Your Circuits Are Having a Nervous Breakdown
What People Ask: “Breaker trips when microwave and toaster are on”
The Problem: Your kitchen shares a circuit with the garage, a bathroom, and possibly next door's shed.
Tips from the Pros
Install at least two dedicated 20-amp circuits that run from your electrical panel (breaker box) to your kitchen countertop outlets. 'Dedicated' means each circuit serves only those kitchen outlets and it's not shared with other rooms. Your microwave and toaster get their own power line that doesn't also feed the garage or bathroom.
Space outlets every 24 inches maximum
Add GFCI protection near water
Run separate circuits for microwaves and other appliances that draw serious power


DIY Fix:
Pop-up outlet keep surfaces clean (yes, there are plug in ones)
Add PlugMold strips under upper cabinets for hidden power access
Stop plugging everything into the same outlet
Call a Pro When: Adding new circuits. Electricity can kill you, and your homeowner’s insurance will have questions.
5. Lighting (Or the Lack Thereof)
What People Ask: “How to fix shadows on kitchen counters”
The Problem: One ceiling light. Shadows everywhere you’re actually working. The construction left you in the dark, literally.
Tips from the Pros
Use three types of lighting: general light for the room, focused light where you're working, and targeted light for specific areas.
Ambient: Recessed ceiling lights every 4 feet
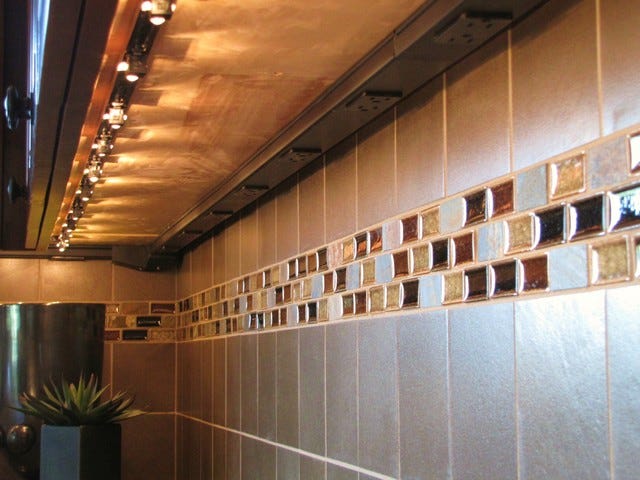
Task: LED strips under cabinets (3000K color temperature—that’s “warm white,” which makes food and counters look natural rather than morgue-blue or sickly yellow)
Accent: Pendants for areas where you want to see properly
DIY Fix: Under-cabinet LED strips are genuinely straightforward. Battery-operated or plug-in versions exist. Put everything on dimmers so you can go from “surgery prep” to “romantic dinner”.
Call a Pro When: Hardwiring ceiling fixtures or cutting holes for recessed lights.
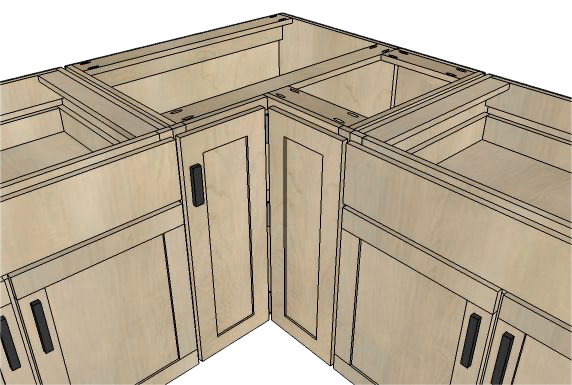
6. The Corner Cabinet (Where Things Go to Die)
What People Ask: “Best pull out for blind corner cabinet”
The Problem: Items placed in deep corner cabinets need an archeological dig to retrieve that serving platter.
Corner cabinets create a blind spot where the two cabinet runs meet at a right angle. The opening is narrow, but the interior space extends deep, sometimes 24-30 inches back.
Tips from the Pros
Avoid static shelves. Best Solutions Ranked:
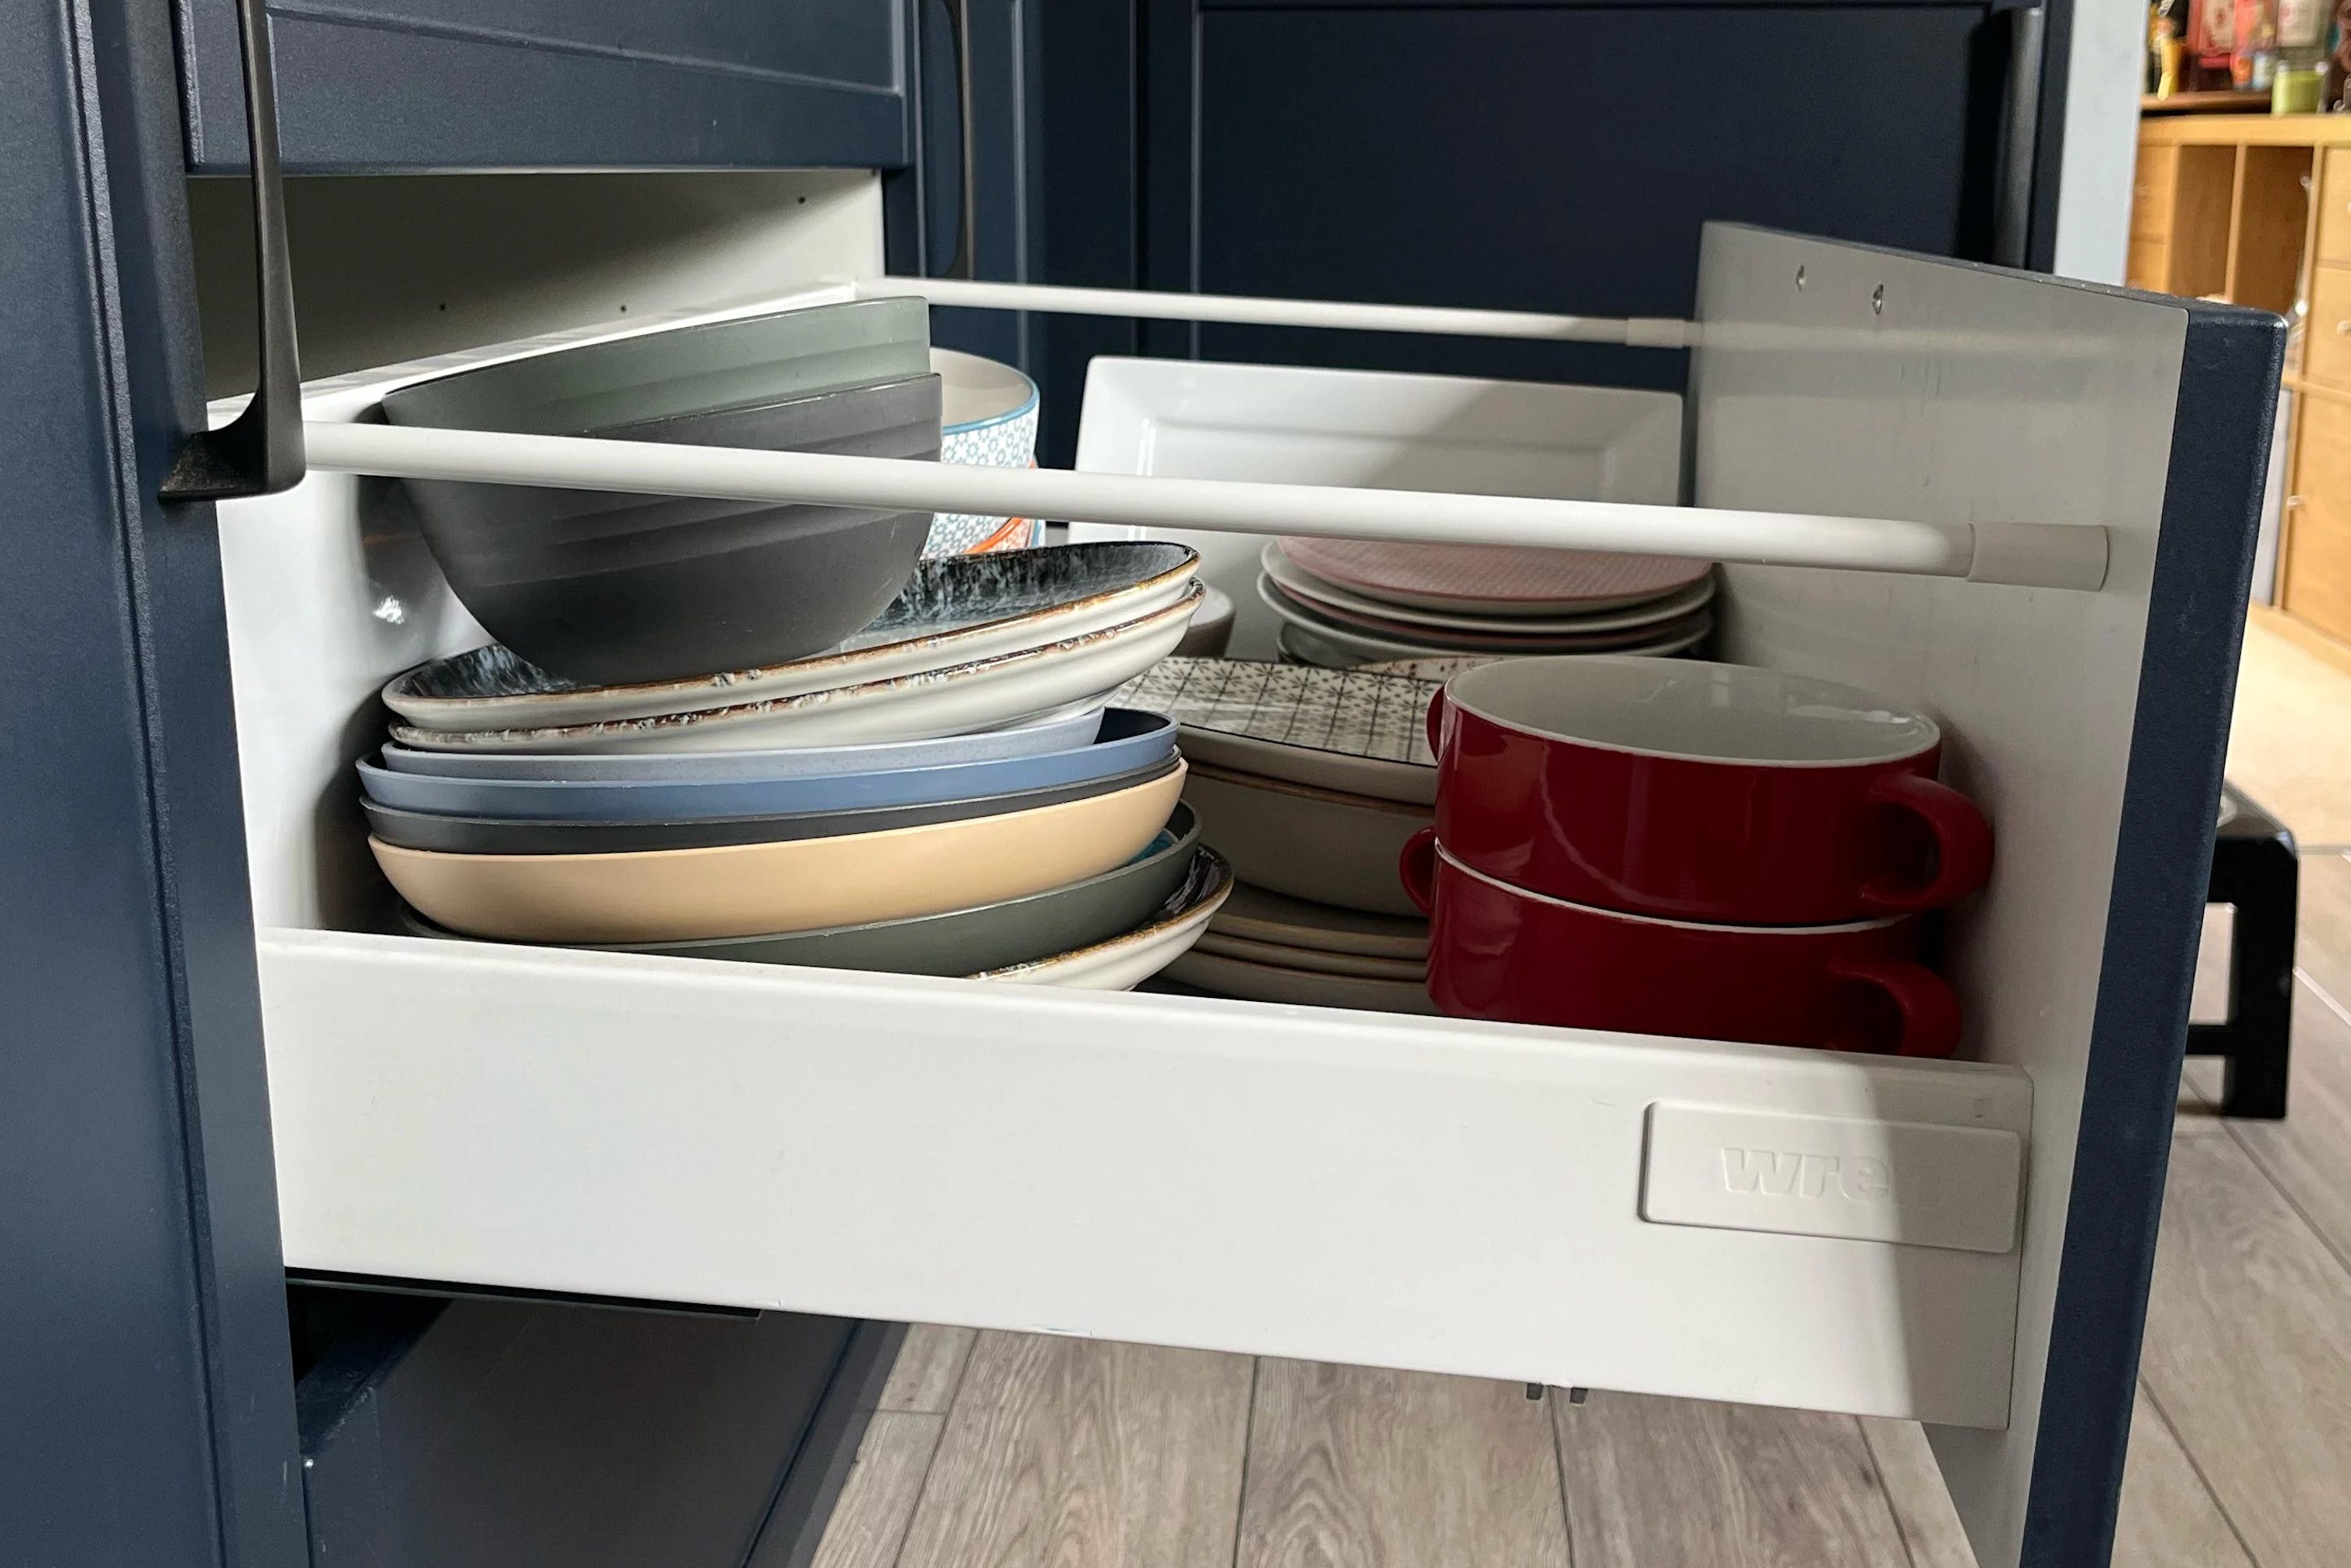
Corner drawers – Full access, expensive, elegant
Magic corners/LeMans – Shelves that swing out completely
Easy access with Lazy Susan – Functional but wastes space
Diagonal corner cabinet – Only works in large kitchens, sacrifices counter space


DIY Fix: Install a lazy Susan or Magic Corner system. If you’re stuck with the existing cabinet. Stop storing anything important back there.
Call a Pro When: Installing new cabinetry. Shift corners into pantries or pull-out towers instead.
7. Cabinet Hardware Held Together with Optimism
What People Ask: “Why is my kitchen drawer sagging?”
The Problem: Drawers sag. Doors slam. Handles attached by one screw. This is a number one annoyance.
Kitchen drawers sag because of weight, materials, and wear. When drawers are overloaded or heavy items aren't distributed evenly, the bottom panel and slides bend over time. Thin drawer bottoms and cheap slides can't resist that bending, while moisture and everyday use make the problem worse. Loose screws and misaligned hardware compound it.
Tips from the Pros
Don’t overload drawers, spread heavy items across multiple drawers.
If the bottom is flexing, reinforce it with a piece of plywood or cleat underneath. Tighten all slide screws and check alignment with a level.
Full-extension slides for actual access to the back. Undermount slides rated to 100+ pounds for heavy items. Check ratings before you buy.
Soft-close hinges to reduce wear
Solid metal pulls rather than hollow ones
DIY Fix: Upgrading drawer slides is manageable if you measure carefully and follow instructions.
Call a Pro When: The cabinet boxes themselves are failing. That’s replacement territory.
8. The Unsupported Overhang
What People Ask: “Maximum quartz overhang without support”
The Problem: Your 14-inch overhang has no support, so it flexes like a diving board. That quartz is going to crack, and it’ll be expensive.
Stone countertops are heavy but brittle. Without support, the cantilevered section acts like a lever, any downward pressure at the edge multiplies the stress at the attachment point. Quartz and granite both fail this way, though quartz tends to crack faster because it's an engineered material with more uniform stress distribution.
Tips from the Pros
Support any overhang beyond 10 inches with steel brackets or corbels every 18–24 inches. If your counter sticks out far enough for someone to comfortably sit with their knees under it (12-15 inches), it needs reinforcement underneath, spaced about arm’s-length apart.
Allow 15 inches of knee space, meaning the support bracket sits far enough back that people's knees don't hit it, and give each person 30 inches of counter length.
Use the 70% rule: 70% of the countertop needs support. Use hidden steel supports or if you prefer, corbels.


DIY Fix: If you already have an unsupported overhang, retrofit brackets before disaster strikes. They’re not that expensive compared to replacing cracked stone.
Call a Pro When: Installing new countertops. Support should be part of the original specification.
9. The Floor; Uneven, Cracked, or Both
What People Ask: “Hairline cracks in kitchen tile or grout”
The Problem: Your tile is cracking because the subfloor flexes. Or there’s a height transition between tile and wood that catches your toe every morning.
Tile and grout are rigid materials installed over a subfloor that naturally flexes. If the subfloor isn't stiff enough or properly prepared, that flexing transfers to the tile. Grout cracks first because it's the weakest link. Then the tiles themselves crack.
Height transitions occur because tile sits higher than adjacent flooring due to the mortar bed. Transition strips solve two problems: they create a gradual slope so you don't trip, and they protect the tile edge from chipping.

Tips from the Pros
Verify subfloor can support stone before installation
Use uncoupling membrane (Schluter-Ditra) or leveling compound
Install transition profiles where materials meet
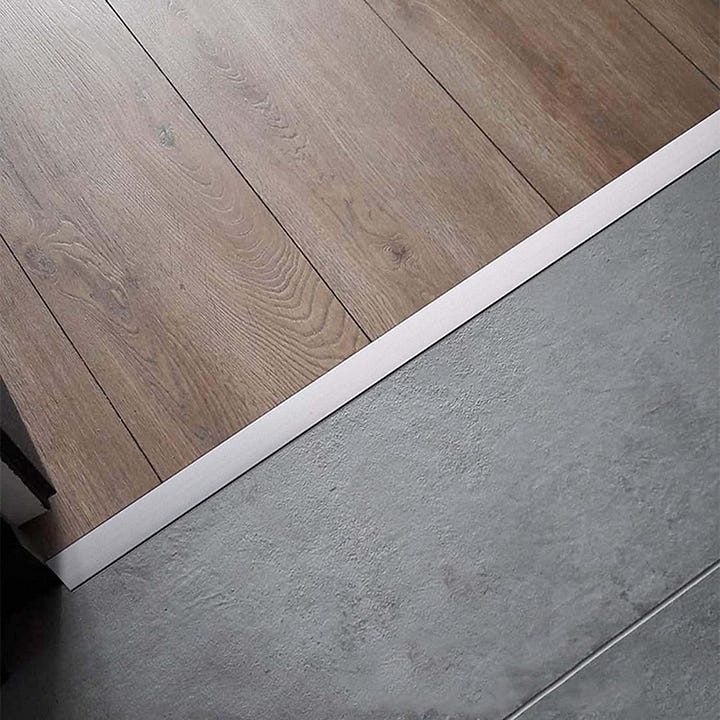
LVP and floor transition strip


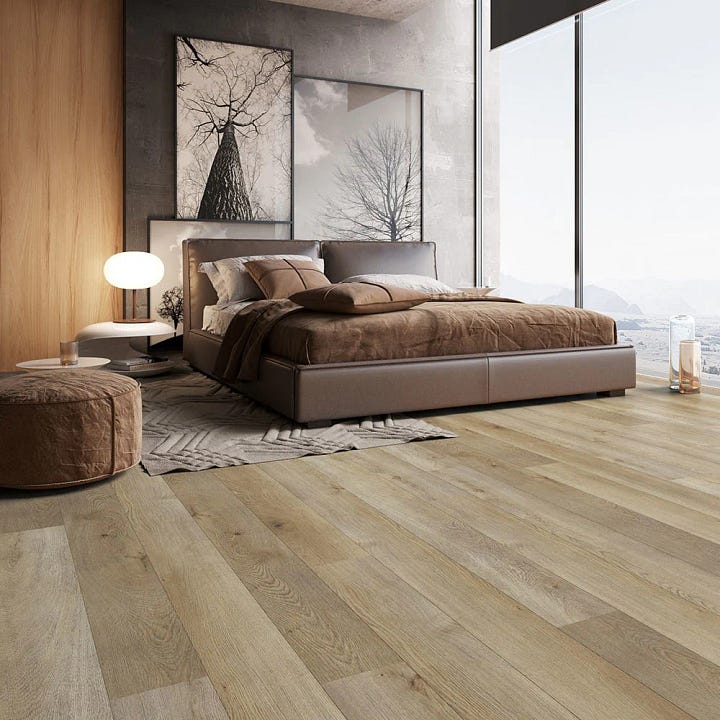
DIY Fix: If choosing new flooring, consider waterproof LVP (Luxury Vinyl Plank) or cork. Easier on joints, budget, and dropped dishes.
Call a Pro When: You see cracks or significant height differences. Subfloor issues require actual structural work.
10. The Leak Under the Sink
What People Ask: “Water pooling bottom of sink cabinet”
The Problem: A slow leak you’ve been ignoring and the cabinet bottom now has the structural integrity of wet cardboard.
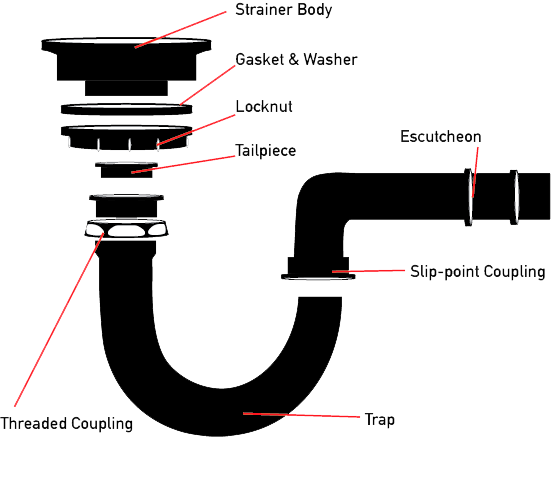
Undermount sinks are glued or clipped to the bottom of your countertop. That seal eventually fails, and water leaks between the sink edge and counter. The drain connections use rubber washers (gaskets) that get squeezed tight by threaded nuts (locknut, coupling nuts, and washers in below). Too loose and water drips out. Too tight and you crush the washer so it can't seal.
Tips from the Pros
Diagnose first: dry everything, run water, observe
Leak at sink edge = failed sealant where sink meets counter
Leak at threaded connections = misaligned or overtightened fitting
Leak from trap (the curved pipe) = replace it
Re-seal undermount sinks every 3–5 years
“Hand-tight plus a quarter-turn” for compression nuts - overtightening causes leaks, counterintuitively
DIY Fix:
Check undermount sinks for gaps. Any daylight means future water damage
Install a drip tray and moisture sensor ($30 versus $1,000+ in cabinet/counter replacement)
Re-caulk when you see gaps or staining
Call a Pro When: There’s structural water damage or you need to resupport an undermount sink.
In Summary
Most kitchen problems trace back to someone choosing aesthetics over logic. Some you can fix yourself. Others require professionals who won't electrocute themselves or flood your crawlspace. The trick is knowing which is which before disaster strikes.
Excellent tips! We’re just in the planning stages of a total kitchen redo. Thinking through your own ways of working and what-all you have to store is a useful exercise. Also: why are appliances so damned expensive?! Two suggestions I came across recently: the Reddit thread BIFL (“buy it for life”) has good suggestions for quality. And Costco is a great place to buy appliances.
That CFM calculation for range hoods is the kind of detail most people skip until smoke sets off the detector. The 100 CFM per 10K BTU rule makes way more sense than generic sizing charts. Also surprsied how many kitchens Ive seen with recirculating hoods marketed as ventilation when theyre basically just expensive air freshners.